Thursday, January 26, 2012

Do You Have Your Zelda Calendar?

It's new AND improved!

Remember back in November when I entered the "History of Hyrule" Legend of Zelda calendar contest?  Well, I completely forgot to update you with the results!  I didn't make it into the official fanart calendar, but I'm still thrilled I managed to finish the entire piece.  (AND, I did make it into the Northern Ohio SCBWI calendar, so no worries--2011 was quite a fulfilling art year!)  The winners had some spectacular entries and I just knew many of them would be picked as the best of the best. 

The super-cool thing, though, is that the site master created a template so anyone can make a FREE calendar with their favorite entries!  I was so happy when I read this announcement; a few of my favorite entries weren't chosen as winners, and this template lets everyone print their own one-of-a-kind fanart calendar.  If you're a Zelda fan and don't have a 2012 calendar yet, you can head over to the site and create one with your favorite pieces.  (There's a really sweet pic of Link leading a bunch of cute animals on parade.  It would be great for May--the best month ever and a certain blogger's birth month.  Just saying.)  Because I'm a nit-picky perfectionist, I couldn't resist working on some of the trouble spots in my pic over the past few months, and the site has my new and improved entry up and ready for downloading.  (I am much happier with the piece now!)

So why didn't I tell you about this weeks ago?  Well, the calendar site had a few blips, and then I went on vacation, and then I plum forgot.  And if you think about it, Chinese New Year was on Monday, so technically the new year is just getting started!  (Yeah, I finally put up my calendar yesterday...)   You can download the Zelda calendar here and see all the winning entries, too!  And while you're on the site, do take a look around; History of Hyrule has a wealth of goodies for any Zelda fan.  (By the way, you also still have a few more days to order a Northern Ohio SCBWI calendar if video game art is not your cup of tea.  Alas, they are not free, but they are worth every penny and support a great organization!)

"History of Hyrule" is announcing their 2013 Calendar Contest theme soon.  I can't wait to get started on this year's entry!  :)

Wednesday, January 25, 2012

Another Big Thank You!

A cyber-hug from yours truly!

Goodness gracious!  Did you see that number on the side of the screen?  It's over 2,000 page views now!  I was thrilled when I reached 1,000 page views back in November, but now I'm absolutely ecstatic that my traffic has doubled in just two short months!

I truly appreciate each and every peek you take at my ramblings and hope you enjoy your time here.  Thanks once again to all my loyal readers--the folks near and dear to my heart as well as those mysterious beings who live far and wide across the cyber world.  Since I can't share my gratitude in person, I hope the above cyber-hug is enough to let you know how much your readership means to me.

Who's up for striving for 5,000 page views?  :) 

Saturday, January 21, 2012

Disney Trip Highlights: The Food!

Food, glorious food!

One of the reasons we even went to Disney World was because they were offering something amazing called the "Free Disney Dining Plan."  I already looooooooove the food at Disney, and getting it for free is just the icing on the cake!  (Pun intended.)

Because we stayed at a "Moderate Level" hotel, our free dining plan included one Quick Service Meal (consisting of one entree, one drink and one dessert from a counter-service restaurant), one Table Service Meal (consisting of one all-you-can-eat buffet OR one ginormous entree, one drink, and one equally ginormous dessert at a sit-down restaurant) AND one snack from anywhere (consisting of one jumbo pastry, one gargantuan muffin, one behemoth Rice Krispy treat, one scrump-diddly-umptious ice cream novelty, etc.) PLUS a refillable resort mug for unlimited beverages at the hotel.  Sound like a lot of food?  Yeah, it was!  (Did I mention my pants hated me at the end of the week?)

In the words of the Grinch, you might say...
Then guests, young and old, will sit down to a feast,
And they'll feast...
And they'll feast, feast, feast, feast!
They'll feast on ten puddings,
Mickey Mousse and Roast Beast (er--Beef!)
Oh, Roast Beef is a feast--I can't stand it the least!

Salivating yet?  Well, if you aren't, then here are our meal highlights to whet your appetite!

Chef Mickey's Dinner Buffet:

The night we arrived at Disney, we utilized our first Table Service meal, even though we didn't go to a park that day.  "Chef Mickey's" is an all-you-can-eat buffet at the Contemporary Resort featuring Disney characters who walk around the restaurant for pictures.  (Yes, the Disney Dining Plan is so awesome that you can use it on character meals!)  We didn't choose the restaurant for the character part, but who doesn't love eating dinner with Donald Duck?

Donald did not want any of our chicken fingers.
 
And the food itself?  Delicious!  We feasted on adorable Mickey Ravioli, tender spice-rubbed prime rib and an Orecchiette pasta dish with savory cream sauce and mountains of mushrooms.  The buffet featured sides for every appetite, from parmesan mashed potatoes and sweet corn bread to mango chutney and pita chips with hummus.  And yes, I raided the kid's buffet, too, where I took generous helpings of Mickey Macaroni & Cheese and Goofy's Cheese Pizza (aka--the best pizza EVER!)

This was helping #2.  (I already bit off one ear of my Mickey Ravioli!)

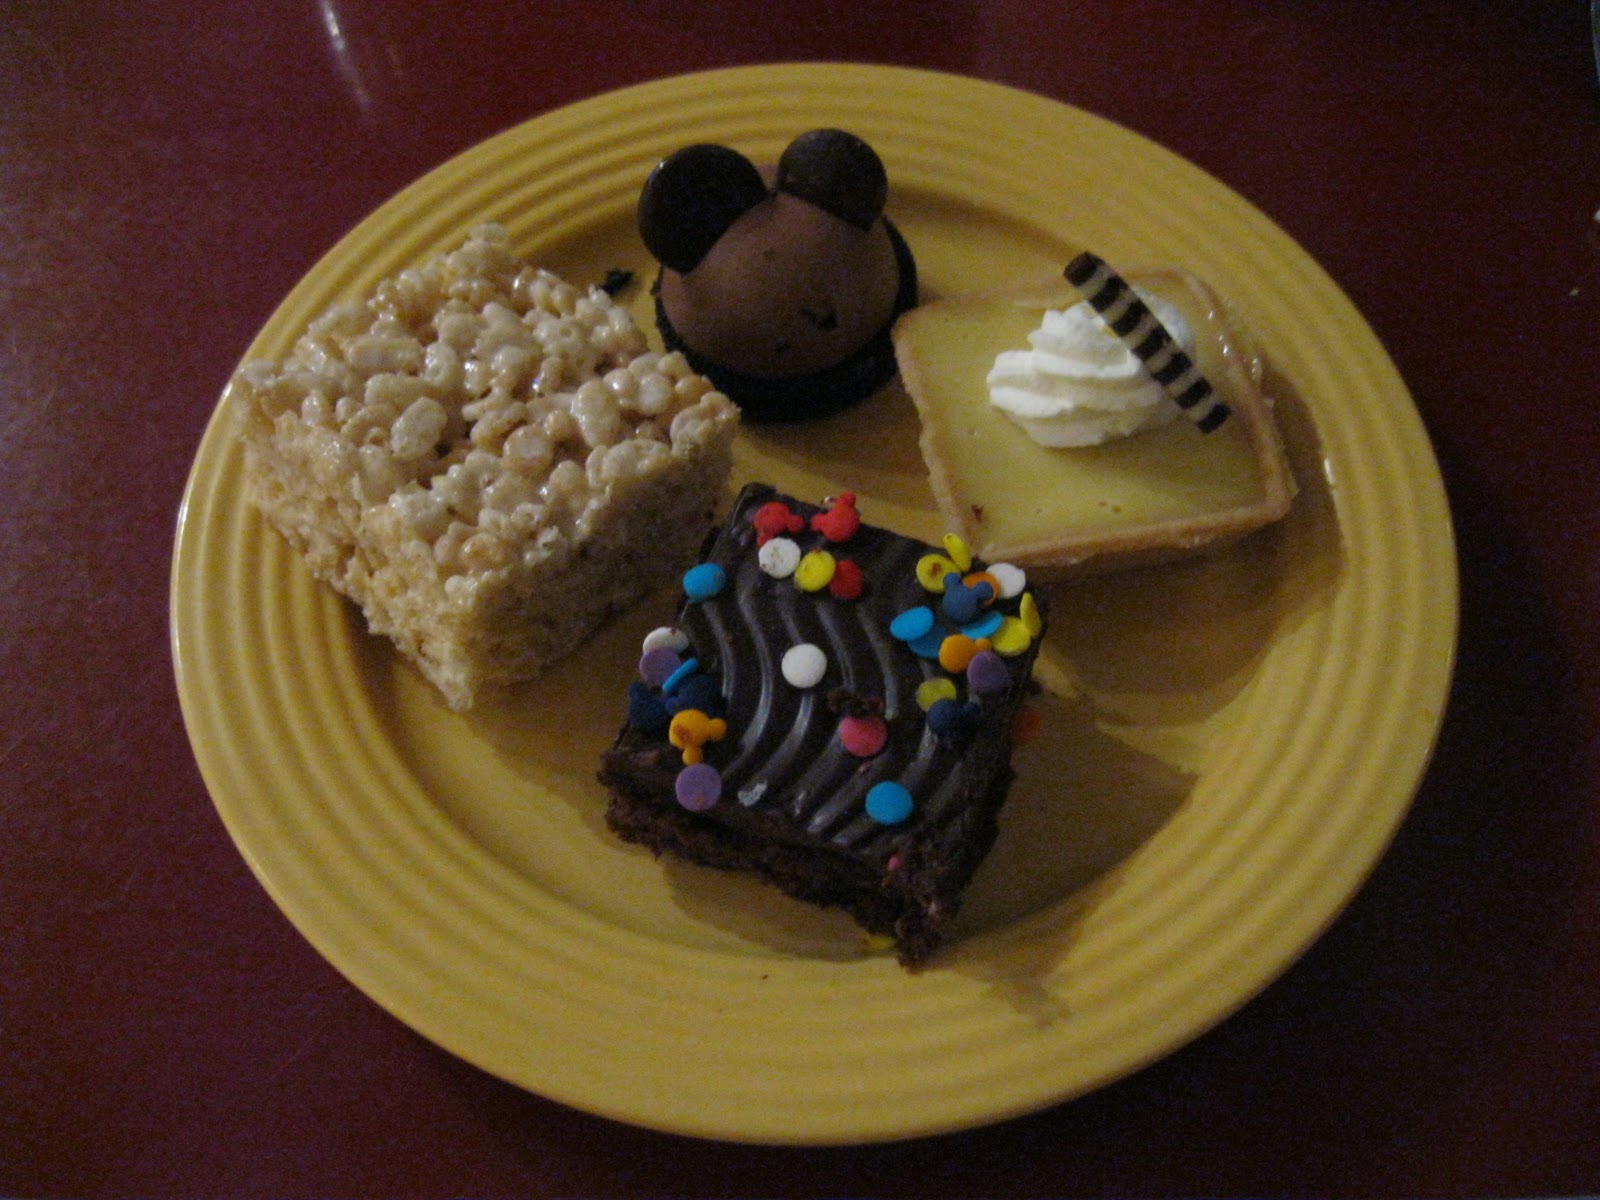
I was already stuffed when it was time for dessert, but still helped myself to a super-cute Mickey Mousse, a Rice Krispy Treat, a Mickey Brownie (complete with Mickey sprinkles) and a mini-key lime pie.  YUM YUM YUM!

Look at those Mickey ears!  Too cute!


Akershus Royal Banquet Hall:

The "Akershus Royal Banquet Hall" is a sit-down restaurant at the Norway Pavilion in EPCOT.  It is a character meal featuring the Disney Princesses, a to-die-for menu, and a castle-themed atmosphere.   I can honestly say this was hands down the BEST meal of our entire trip.

At Akershus, we feasted first on the "Taste of Norway" appetizer selection featuring cold meats, bread, potato and pasta salads (such as Chicken and Apple Salad), and a variety of Norwegian cheeses.  Then, we picked our entree selections from the menu.  Our awesome vacation planner, Amy Canterbury, let us know ahead of time that we could actually order multiple entrees at this restaurant.  They don't tell you that at the restaurant, but if you know ahead of time, you can get even more for your money.  (It's a great option, too, if you are debating between two entrees on the menu--which, of course, we were!)  So, our waitress brought us all generous helpings of Mushroom-Stuffed Pasta with parmesan cream sauce, Swiss chard, and delectable mushrooms AND an order of the Traditional Kjottkake to share.  (The Kjottkake were Norwegian meatballs served with Lingonberry sauce and mashed potatoes.  YUM!)  And the dessert was unbelievable featuring a sampling of chocolate mousse, a puff pastry with mascarpone and berries, and (tastiest of all), traditional rice cream topped with strawberry sauce!  (Mmmm...rice cream with strawberry sauce....)

Honestly the food was so darn delicious, I forgot to take a picture of it before it was in my belly!  But we did get some nice pictures of us with the Disney Princesses, though.

Snow White was funny, too.  I blinked in the first pic and she called me a "Sleepy Dwarf!"


If you go to Disney and have some princesses of your own, this is a must-eat-at restaurant experience.  And if you go to Disney and don't have any princesses, you should eat here anyway because it's AMAZING.  Just thinking about it makes my mouth water...   

Donald's Safari Breakfast:

If there's one thing I love, it's a good breakfast buffet.  "Donald's Safari Breakfast" is a character meal located in Disney's Animal Kingdom.  Safari-outfitted characters walk around the restaurant while you treat yourself to an all-you-can-eat buffet with an African-inspired flair.

The only bad thing about breakfast buffets?  They are too early in the morning!

After supplying our table with generous glasses of Jungle Juice (a mix of orange, papaya, and mango juice only found at a few restaurants in Disney World), our waitress showed us to the glorious breakfast buffet.  While the restaurant offered the standard cereals, danishes, oatmeal, bacon and scrambled eggs seen on most buffets, it also showcased some tasty exotic dishes, like mango chocolate bread, fried plantains, and Mealie Pap (a type of yummy porridge.)  There were more fruit spreads than I could count, savory frittatas, and Mickey waffles with warm syrup.  And of course, like any good Disney breakfast buffet, there were mounds of chocolate croissants just waiting to be devoured.  (I ate three.  I'm not even kidding.)

The breakfast of champions!

Liberty Tree Tavern:

While character meals are fun (particularly free character meals), sometimes it's nice to just sit and eat dinner while not taking pictures every two minutes.  The "Liberty Tree Tavern" in the Magic Kingdom is a long-time favorite of my family.  It's all-you-can-eat, all-American fare served family style at your table. 

No matter how many times we've eaten here, the food never gets old.  First, we were served drinks in tavern-style tankards along with salads and scrumptious rolls with honey butter.  (I ate five.  Again, I am not kidding--they are that tasty.)  Then, the main course came to our table in bowls for sharing.  The elaborate, patriotic spread consisted of roasted turkey breast, carved beef AND sliced pork, accompanied by mashed potatoes, herb bread stuffing, macaroni and cheese, cauliflower, green bean casserole, and gravy.  (Talk about a feast!)  And for dessert?  A big bowl of Johnny Appleseed's Cake--warm white cake with apples and dried cranberries topped with heaping scoops of ice cream. 

Soooooo good!

And in case you think I'm kidding about how much food was served, take a look at this:

This feast is mine--all mine!  MWA HA HA!

Beware: your pants will extra-hate you after this meal.

50's Prime Time Cafe:

Our last sit-down meal was at the "50's Prime Time Cafe" located at Disney's Hollywood Studios.  This is also a long-time favorite of our family.  (I can remember eating here with my grandparents back when I was in elementary school!)  This is a really fun, 50's-themed restaurant complete with poodle skirts and rabbit-ear TV's showing "I Love Lucy" clips.   The servers act as your "Mom" and "Dad," yelling at you for putting elbows on the table and withholding dessert until you've finished your vegetables.  (I was even sent to the corner one year for disobeying the elbows on the table rule.)  It's all in good fun, though, and the food is so good you'll want to eat all your veggies anyway.

Unlike the other buffet and family-style meals we did during this trip, we ordered off a menu at this restaurant.  (Don't worry, you still get more food than your tummy can handle anyway!)  Our vacation planner clued us into another little-known tip that instead of regular drinks, we could order milkshakes or malts for this meal.  So, my main meal consisted of one humongous chocolate malt and Grandma's Chicken Pot Pie (complete with cheesy sauce and a flaky crust!)

Yes, it was as yummy as it looks.

Since the chocolate malt apparently didn't satisfy my sweet tooth, I ordered S'mores for dessert.  They were toasted to perfection and drizzled with chocolate sauce...

I like to call them, "Mega S'mores!"

And those were our sit-down meals for the week!  I highly recommend eating at any (or all) of the restaurants above during your next trip.  But remember, those were just our sit-down meals!  We had a ton of tasty counter service meals and snacks, too, including: mushroom-Swiss-onion burgers; "Pizza Planet" personal pizzas with Cappuccino cupcakes; mango-pineapple muffins; Mickey Mouse ice cream sandwiches; Yak and Yeti's beef lo mein; and cheese empanadas that were so good, a seagull stole mine off my plate while my back was turned!  (Don't worry--Disney gave me new ones.) 

Before you start pointing at me and saying, "Oink, oink," remember, we only ate this much because we had the free Disney Dining Plan.  Ordinarily, my lunches at Disney consist of one meal shared with my sister, a cup of free tap water to drink, and NEVER, EVER dessert.  (We have always treated ourselves to a nice dinner in the parks, though--however sans dessert and drinks!)  If you're going to visit the Mouse and don't care when, you really should plan your trip during the off-season when Disney often offers plans like this.  (My sister and Off To Neverland Travel can tell you when such deals are available!)  You may stuff yourself like a holiday turkey, but hey, isn't that what vacations are for?

Now excuse me, it's time to go enjoy my lunch of Yoplait yogurt and PBJ.  (I'll just have to pretend it's accompanied by pomegranate lemonade, Mickey Ravioli, and Mega S'mores....)   

Thursday, January 19, 2012

Disney Trip Highlights: The Rides

As I mentioned in my last post, I looooove sharing my love for all things Disney.  And if you love Disney, too, then you probably love reading about all things Disney.  (That's a lot of Disney love!)  Here are some of the ride highlights (and some insider tips) from our trip:

Disney's Hollywood Studios (which I will always call MGM Studios):

Waiting in line with that behind you makes you want an ice cream sandwich...

"Toy Story Mania" was particularly cool, and new since my last trip to Disney.  You ride in little cars wearing 3-D glasses and play midway games with a digital launching device on screens throughout the attraction.  The cutest game was the Ring Toss where we tossed virtual rings around those adorable Toy Story aliens.  Even the waiting area was incredibly detailed and charming, with life size board games and crayon drawings of Andy's toys which we got to amuse ourselves with during the two hour wait.  (Tip: "Toy Story Mania" is fun, but NOT two-hour-wait-in-line-fun.  If you can't get a Fast Pass, be prepared to wait in line for a looooooong time or just save it for your next trip.)


Yes, we disobeyed the rules by wearing our glasses before entering the theater.

"Muppet Vision 3-D" is always one of my favorites and a must-do for each Disney trip.  It's Muppets.  It's 3-D.  What's not to love?
 

No, I do not have any idea what that kid behind me is wearing on his head.
"The Magic of Disney Animation" attraction was updated from my last trip.  While it lost an adorable movie of classic Disney film clips, it gained a really fun drawing studio.  We all sat at Mickey-inspired tables and learned how to draw Goofy step-by-step with our animator instructor.

Mom's Goofy (top), my little sister's (left) and mine (right.)  How cute!

Disney's Animal Kingdom:   

How cool are those ginormous horns?!

I love the "Kilimanjaro Safari" ride.  Your driver takes you on a "safari" through a wildlife preserve where animals graze and roam to their heart's content.  (Sometimes they even block the road!)  We always ride it at least twice because you never know what animals you'll see.  (Tip: While the line was pleasant in the winter weather, it is historically rather unpleasant in the sweltering summer heat.  Get a Fast Pass!)


Simba taps his paws, nods, and swings his tail to the jungle beat.  RAWR!

"The Festival Of The Lion King" is a live show based on the best movie of all time.  (Hey, you already know I'm a little Lion King-biased!)  There's dancing, acrobatics, fire-twirling, and, of course, Simba!  What's really cool is that the animatronic Simba and other animals all bob and dance to the music, too.  (Tip: Arrive early to get a good seat.  Trust me--it's worth it!)

EPCOT:

I think I have about 10 years of pics just like this...

Ever wonder what's inside that big ol' golf ball?  Well, quite frankly, it used to be a ride that put me to sleep.  But "Spaceship Earth" ride got a facelift since my last trip, and it is a definite improvement!  Now, Judi Dench delightfully narrates your trip through the history of communication and there is a hilarious "hypothetical future" interactive feature at the end of the ride.  (After choosing some preferences, you and your ride buddy get to literally see yourselves in your ideal future--complete with robots and tree houses that would make the Swiss Family Robinsons jealous!)


In the Big Blue World, I'm gonna go explore!

Yup, I'm sharing this picture again.  "The Seas With Nemo & Friends" is just too cute not to share with you all!  Another formerly-dull ride originally named, "The Living Seas," the Pixar-inspired updates make this ride one you cannot miss.  Nemo, Marlin, Dory, and all those other lovable fishies "swim" inside aquariums with real marine life.  It's a very relaxing ride and will make you hum the new Nemo song "(In The) Big Blue World" for the rest of the day.  (And how can you not love a ride where you sit in "clamobiles"?)

Magic Kingdom: 


If two-hour waits make you cringe, too, then "Buzz Lightyear's Space Ranger Spin" is a wonderful alternative to "Toy Story Mania."  (Or, a wonderful compliment if you want to wait in line for both!)  This ride came before "Toy Story Mania" and is similar, except that you shoot aliens and Emperor Zurg with a laser-guided blaster.  My sister may have smoked me at "Toy Story Mania," but I think I showed her who's the best Space Ranger in the galaxy.  ;)

My sister's score (left), my score (right).  She left the ride kind of grumpy.

And last but certainly not least....

There is just one moon and one golden sun...

You just can't go to Disney without riding "It's A Small World!"  ('Nuff said!)

And that completes my ride highlights from our Disney trip!  Getting in the mood to go visit the Mouse yet?  (Remember: my sister, Amy, and "Off To Neverland Travel" can hook you up with a dream vacation!) 

Start getting excited--the food highlights come next!  :)

Note: I forgot to take a pic of the outside of "Buzz Lighyear's Space Ranger Spin," so the entrance pic above is from wdwmemories.com.

Wednesday, January 18, 2012

Home From Disney!

I'm holding hands with my Peter Pan shadow!

Hello again!  Long time no see, eh?  I am now home from Disney with my Mom and little sister and had an absolutely wonderful time.  We ate, we laughed, we got lost, we ate, we bonded, we laughed some more, and ate until even my little sister had to refuse dessert.  Contrary to that sleeping Simba at the bottom of my last post, I am NOT well-rested (12 hour days in the park will wear you out), but my spirit is certainly happier.  :)

If it was up to me, I'd visit Mickey every year.  (I think it would do wonders for my stress-levels.)  Unfortunately, my wallet doesn't have a limitless supply of Disney Dollars.  As such, during my last trip, my little sister was literally little:

Awww, how cute!

So much time passed between those trips, that now she's not so little anymore:

In fact, now she's taller than me!

I feel extremely fortunate that I had this opportunity to spend some quality time with her, because she could very well be in college before my next trip!  We made a lot of goofy memories...

Case in point.

...brought out our inner preschoolers...

Neigh!

..and did I mention we ate a lot?

Yes, I am totally double-fisting dessert!

And even though it was not quite as warm as we would have liked...

Add some gumdrop buttons, and I'm Gingerbread Kathryn!

...we loved every minute of the Disney magic.

We're the Three Mousketeers!

The "real world" could learn a lot from Disney's world.  Where else can you go where strangers make you feel like family, little girls can be princesses, and everyone is unconditionally encouraged to follow their dreams--no matter how foolish and far-fetched those dreams may be?  :)

So, have I inspired you to go on a magical Disney Trip too?  Well, one of my other sisters, Amy Canterbury, just so happens to be a Disney Travel Agent with "Off To Neverland Travel."  She planned our entire trip, from dinner reservations to resort booking, so we didn't have to lift one finger!  If you ever feel that irresistible Disney World tug, you should check out her Facebook page here.  (You don't even pay her for her services--Disney does!  Score!)  I guarantee she'll make your trip extra-magical. 

Over the next couple days, I'm going to post some more pics and details about our trip highlights--especially the food.  If you are interested (or love Disney as much as I do), you should check back!   

(Warning: reading upcoming blog posts may cause excessive mouth-watering and a loss of control over your wallet.  Don't say I didn't warn you.)

In fact, this post has hit me with a wave of nostalgia.  Can I go back to Disney now?

Wednesday, January 11, 2012

The King Has Returned!

Boy, do I have a treat for you today!  As I mentioned in my last post, I am thrilled to be going to Disney World at the end of this week.  And what better way to commence my trip then to share my finally-finished 30 Simbas with you!

You may remember back in this September post that I planned to follow up my "30 Horses In 30 Days" endeavor with "30 Simbas In 30 Days."  With calendar contests, the Christmas card illustration, the holidays, and life in general, they didn't end up being 30 consecutive days, but I have officially completed the exercise.  Huzzah!

You may be wondering, "What took you so long?"  Well, all I can say is that this ended up being a difficult project for me.  Simba is one tough kitty to draw, and I mean REALLY TOUGH TO DRAW!  What's so difficult about him?  Oh, just his paws, his ears, his hair as a cub, his hair as an adult, his nose, his whiskers, his chin, his tail, his eyes, his....

Well, you get the idea.  These things were so difficult for me, though, because I wasn't drawing in my own style.  The "30 Horses" project was easy peasy in comparison; all I had to worry about was getting the anatomy right, while the style remained my own.  With the "30 Simbas" project, I had to worry about drawing both the lion anatomy AND the Disney style accurately.  To make matters more frustrating, Simba is a rather inconsistent character.  Sometimes he has a line through the middle of his nose; sometimes he doesn't.  Sometimes he has tufts in his ears; sometimes he doesn't.  His number of whiskers change; his bangs swap sides; and it makes a nit-picky, eagle-eyed perfectionist want to scream.

I don't care what Disney says.  This Simba is NOT the same---

---as this Simba.  (Unless he lost 20 pounds in 10 seconds?)

And don't even get me started on Lion King Simba versus Lion King II Simba!  I learned by day 11 to only use the original movie as my reference source.

Who is this guy?!  He's one eye-shadow wearing, smooth-maned Simba!

This was the first (and last) Lion King II Simba I drew.

With so many inconsistencies and issues I came across mimicking the Disney style, these sketches didn't take 5-15 minutes to complete like the horses.  No, they took more like an hour (or two!)  Since I just don't have an hour to devote to Simba everyday, that dragged out the process even further.  And as if that wasn't enough to slow me down, I also have something I like to call, "Enormous Simba Syndrome," wherein my Simba sketches literally got ENORMOUS!  No matter how hard I tried to block out the body shapes and keep my Simbas within the confines of my sketchbook, time and time again he ended up falling off the paper.  I couldn't just leave those Simbas without paws or a neck, so I had to start over from scratch on numerous occasions.  (So technically, I drew more than 30 Simbas.  Take that!)   

This was take 2 for Simba #28. I wanted to wring my own neck each time I did this...

As difficult as this project was, though, I'm very glad I stuck with it.  It was a wonderful exercise in precision and control.  It also gave me a new respect for Disney animators.  I already thought they were completely awesome, but now I know first hand how hard it is to draw in someone else's style.  The sheer fact they can animate an entire movie in the same style with a whole TEAM of artists is simply mind-boggling!   (Barring those ear tufts and fat-faced Simba discrepancies, I'd say the end result is astonishing.)  

But enough of my jabbering--let's get to those Simbas!  Here's a general progression of my project:

I started with 4 days of this tutorial pose to commit the body shape to memory.

I then moved on to 4 days of another tutorial to practice facial features.

Days 10-20, I tried to mimic the Disney style. I focused more on young Simba.

In the 20's, I practiced a variety of expressions and focused on adult Simba.

The culmination of my project.  (I tried to draw this about 100 times as a kid!)

Even at the end of day 30, I still see flaws in my Simbas, but there is overall improvement throughout the journey.  (And hopefully I'll be able to draw him just a little bit quicker in the future!)  Even my best Simbas still look Kathryn-ized to me--particularly the shagginess of the manes and whisker tendencies.  (I'm usually a three-whisker kind of gal.)  I also find it funny that my skill-level fluctuated, with some earlier Simbas turning out better than some later ones!   

Simba #10 knows he looks good...
 
Simba #21 says, "How come Simba #10 looks better than me?!"


And my favorite of all the Simbas?  That would definitely be Day 27 :

I love his emotion.  (And wind-swept locks!)

And that pretty much summarizes this exercise!  I hope you enjoyed seeing my progress.  (If I can figure out how, I'd like to compile all 30 Simbas in one Photoshop pic for the full-effect!)  I'm 100% relieved that I can finally cross this project off my to-do list.  While I'm certain I'll be drawing more Simbas in the future, I do think it's time for me to take a little artistic break from my favorite feline.  (Let's just hope my trip to Disney doesn't inspire "30 Bambis in 30 Days"...)

Time to go bask in the awe-inspiring glory of the Disney animators!  See you next week!

I'll be well-rested and raring to blog again before you know it!

Note: If you want to learn to draw Simba, too, I found these two Deviant Art tutorials a great place to begin: dj coulz and Emo-Hellion.  And do start your sketches small; you don't want to end up with "Enormous Simba Syndrome" like me!  :)

Simba is (c) Disney.  I used a variety of screen shots, mugs, piano books, coloring books, etc. for my sketch references.  The screenshots in this post are from The Lion King Source and The Lion King Gallery respectively. 

Sunday, January 8, 2012

COSCBWI Meeting January 2012: Ready, Set, Write!


I know I usually post a summary of COSCBWI's monthly meetings, but today I'm going to tell you about it beforehand!  The Central and Southern Ohio Society of Children's Book Writers and Illustrators (whoo--what a mouthful!) will be hosting our first 2012 meeting on January 14 at 1:00 PM at the Upper Arlington Tremont Library.  Dubbed, "Ready, Set, Write," the meeting is going to focus on your writing/illustrating goals and a group brain-storming session on steps to help you achieve them in 2012.  It's open to all members, and prospective members, too--so if you're thinking about joining SCBWI, this is a great time to see if our group is a good fit for you.  

As the Membership Coordinator of COSBWI, I am usually at every meeting to welcome you with a smiling face and answer your many questions.  However, I am disappointed to say I will be absent from the event next weekend.  (I will be meeting Mickey Mouse, though, so I guess I'm not too disappointed!)  Don't make my absence sway your attendance; our awesome group leaders and super-friendly congregation of writers and illustrators will certainly make you feel like family. :)

If you live in the Columbus, Ohio, area and are interested in writing or illustrating for children, I hope you will attend!  You can find more information on our group website at: www.coscbwi.org.  (And if you decide to join, then I will definitely see you at the February meeting!)

Have fun!  (I promise I'll think about you while I'm waiting in line for Space Mountain...)

Note: I believe I am obligated to say that although I am the Membership Coordinator of COSCBWI, this blog is in no way affiliated with the local chapter or national branch of SCBWI.  The thoughts and opinions expressed in this blog are my own, and all that legalese stuff.

Wednesday, January 4, 2012

Step By Steps: "Do You See What I See?"

I'm happy to say that my 2011 Christmas card seems to be a hit!  Since I mailed it out and posted the pic to my blog a few weeks ago, I've been asked many times, "How do you do that in Photoshop?"  First, I'll disclaim that I am NOT AT ALL an expert when it comes to this technology!  But, I loooooove to get a peek of behind-the-scenes stuff myself, so I figured I'd oblige and show you the basic process of how I currently make digital art.

Step 1: Sketch 'n' Scan


I always first sketch out my piece then scan it into the computer.  (Thus far, I've never been able to sketch something directly in Photoshop without it looking like it was made by a preschooler.)  To make my life easier, I measured out the card dimensions in my sketchbook and drew the picture accordingly so I wouldn't have to worry about resizing the whole thing later.

Step 2:  Lineart


After I scan my sketch into the computer, I go over all the lines in black using a "hard brush."  When I'm done, I basically have a coloring book sheet which I can fill in with paint.  I usually draw each character on their own layer so I can move/re-size them independently.  This is the first time I've ever drawn a city background, but it was easier than I had initially feared.  I simply went over each sketched building edge with the "line tool," merged my resulting 40+ layers into one, and voila!  Instant Bethlehem!

Step 3: Basic Background/Re-sizing

You may notice, I added an extra sheep to the flock here, too!

At this point, I like to lay some primary background shapes in the pic before I color the characters.  By doing so, it makes it easier for me to visualize the end result--and it lessens the chance of me having to move fully-colored, multiple-layered characters later.  Here, I can move the characters anywhere I please with the greatest of ease, and I even re-sized Bethlehem since it seemed a little looming in comparison to the sheep.

Step 4: Basic Coloring


Once the characters and other lineart features are where I like them, I paint them in solid colors, using the mid-tone of what I imagine their ultimate shading will be.  Depending on the complexity of the character, I put the colors on different layers.  (For example: the big sheep in the front had three levels of color--one for his coat, one for his face and ears, and one for the pink in his ears.)  This may sound confusing, but it helps me keep the colors separate when shading and makes fixing any mistakes a breeze!  Just like when coloring in a coloring book, I stay inside the lines and clean up any messy parts with the eraser.

Step 5: Shading 

I thought that middle building needed a door here.  I was wrong.

For shading, I like to create a palette for each solid part of each character using two lighter colors and two darker colors.  Then I use the "airbrush" and start shading, changing my opacity along the way.  To make sure I don't go out of the lines, I "lock" my layer so I can only color on the confines of each base.  (For example, when I lock the white of my sheep, I can draw on top of it, but the program won't let me draw on the green or purple parts around it.  Neat, huh?)  I was worried about the buildings in this picture because it's not something I'm used to shading, let alone in Photoshop.  But, with my discovery of how to use the "gradient" tool, I simply used the "lasso" to select each side of the building and added a gradient of two colors--one darker than my base, one lighter.  Voila!  Instant shaded Bethlehem! 

Step 6: Cleaning Up and Merging


This is where the illustration really comes to life!  After I'm done shading, I make sure the characters and features are EXACTLY where I want them, then add the final details like the shadows and palm trees.  Here, I also redid the milky way and finished the sky using pre-made star brushes.  (The goody two-shoes in me cringes at this shortcut.  I try to use pre-made brushes as little as possible.)  At this stage, I also clean up any bits of paint outside the lines that I might have missed earlier.  I debated coloring the lineart here to match the characters, but decided I liked the cartoony look of the heavier black lines.  I also played around with white shines on the eyes, but ultimately left them off since they didn't print well on my NOSCBWI calendar piece.  Once everything is to my liking, I add my signature, merge all the layers together, and save as a JPEG.  (Total layers of this piece: about 55--not counting the 40ish lines that made up the city before merging.  Total hours: A lot.)


Step 7: Color Palette

This is the smallest amount of colors I've used yet!

To keep all my colors easily accessible (and to avoid losing them on all those layers), I've started using a separate document as my painter's palette.  I keep it open the entire time and add more colors to it as I go.  (When I don't do this, colors are lost, mistakes are made, and tears are shed.  LOTS of tears are shed...) 

And that's how I do it!  I'm sure this is not the most efficient way of doing things, though, so I'm always reading online tutorials to help streamline the process.  (Heck, if you have any pointers, I'd LOVE to hear them!)  This is just how I can do it right now to the best of my ability.  :)